(最終更新月:2022年1月)
✔こんな方へピッタリの記事です
「Let’s Encryptを使うと無料でSSL化?設定とか大変じゃないの?」
「certbotを使ってやるとは聞いたけど、、、どうやるの?」
✔当記事を通じてお伝えすること
- 【無料】certbotを使ったLet’s Encryptの導入
ステップバイステップで細かく解説してますので記事自体は長く感じますが、順番に進めれば5分もかからず終了します。
運営者プロフィール
![]()
現在はIT企業のプロダクトマネージャーとして、個人向け/社内向けシステムなど、複数のシステム開発・運営に携わっています。
Webサイト構築やECサイトの開発経験に加えて、PythonなどのプログラミングやSalesforceなどのクラウドアプリケーションに関する幅広い知識・経験を活かして「プログラミング初心者がスムーズに学べるサイト」を目指しています。
Githubでは、趣味で作成したアプリなどを公開しています。
✔人に見せても恥ずかしくないコードを書こう
「リーダブルコード」は、わかりやすく良いコードの定義を教えてくれる本です。
- 見るからにきれいなコードの書き方
- コードの分割方法
- 変数や関数の命名規則
エンジニアのスタンダートとすべき基準を一から解説しています。
何回も読むのに値する本なので、ぜひ手にとって読んでみてください。

【無料】certbotを使ったLet’s Encryptの導入

confファイル書き換え
SSL化を進めるにあたり、Apacheのconfファイルに必要事項を追記しましょう
<VirtualHost *:443> #変更①
	ServerAdmin sample@example.com #ここはあなたのEメールアドレスを入力
	ServerName itc-app.site #ドメインを入力
	ServerAlias www.itc-app.site #www.をつけたドメインを入力

	ErrorLog /nippoApp/site/logs/error.log
	CustomLog /nippoApp/site/logs/access.log combined

	alias /static /nippoApp/site/public/static
	<Directory /nippoApp/site/public/static/>
		Require all granted
	</Directory>

        alias /media /nippoApp/site/public/media
        <Directory /nippoApp/site/public/media/>
                Require all granted
        </Directory>

	<Directory /nippoApp/src/main/>
		<Files wsgi.py>
			Require all granted
		</Files>
	</Directory>

	WSGIDaemonProcess nippoappssl python-path=/nippoApp/src python-home=/nippoApp/venv #変更②
	WSGIProcessGroup nippoappssl #変更③
	WSGIScriptAlias / /nippoApp/src/main/wsgi.py
</VirtualHost>
※こちらは別記事でご紹介している「日報アプリ」公開の際に使用したWebアプリ公開用のconfファイルです
ポート80の記述をコピペして、」変更点は下記の通り
- ポートを「443」へ変更
- WSGIDaemonProcess、WSGIProcessGroupの次にくる名前を変更します
apachectl configtestでエラーが出なければひとまずOKです!
日報アプリについてよくわからないという方も、「ポートナンバーを443にしたものを追記する必要がある」とだけ覚えておこう!
ファイアウォール設定の変更
「Apache Full」を許可
ファイアウォール設定で「Apache Full」を許可しましょう
$ sudo ufw allow 'Apache Full'
「Apache」の削除
もしApacheプロファイルがあるようであれば、重複しているので削除します
$ sudo ufw status
で確認しましょう
「Apache」プロファイルがあれば、下記のコマンドで削除します
$ ufw delete allow 'Apache'
certbotを使ってSSL化の実行
Apache側の設定がおわり、いよいよcertbotを使ってSSL化を開始します
インストールから設定まで、5分とかかりません
上から順を追ってみていきましょう!
①インストール
apt install certbot python3-certbot-apache
②certbot実行
インストールが完了しましたら、実行します
$ certbot --apache
③メールアドレスの入力
まずはターミナル上に下記のような記述がでてきます
メールアドレスを入力しましょう
Saving debug log to /var/log/letsencrypt/letsencrypt.log
Plugins selected: Authenticator apache, Installer apache
Enter email address (used for urgent renewal and security notices) (Enter 'c' to
cancel):
④規約への同意
規約に同意するかどうかと聞かれています
「A」 (Agree)を入力し、「Enter」を押してください↓
- - - - - - - - - - - - - - - - - - - - - - - - - - - - - - - - - - - - - - - -
Please read the Terms of Service at
....
....
- - - - - - - - - - - - - - - - - - - - - - - - - - - - - - - - - - - - - - - -
(A)gree/(C)ancel:
⑤メールアドレスの共有方針
メールをキャンペーン等の目的で共有することはOKか聞かれています
「N」、NOと答えても問題ありません
- - - - - - - - - - - - - - - - - - - - - - - - - - - - - - - - - - - - - - - -
Would you be willing to share your email address with the Electronic Frontier
Foundation, a founding partner of the Let's Encrypt project and the non-profit
organization that develops Certbot? We'd like to send you email about our work
encrypting the web, EFF news, campaigns, and ways to support digital freedom.
- - - - - - - - - - - - - - - - - - - - - - - - - - - - - - - - - - - - - - - -
(Y)es/(N)o:
⑥SSL化するドメインを指定
どのドメインをSSL化するか聞かれています
どちらかだけの場合は数値を入力し、「Enter」
もしくは空欄でそのまま「Enter」を押すと両方の場合でSSL化されるようになります
Which names would you like to activate HTTPS for?
- - - - - - - - - - - - - - - - - - - - - - - - - - - - - - - - - - - - - - - -
1: itc-app.site
2: www.itc-app.site
- - - - - - - - - - - - - - - - - - - - - - - - - - - - - - - - - - - - - - - -
Select the appropriate numbers separated by commas and/or spaces, or leave input
blank to select all options shown (Enter 'c' to cancel): 特に理由がなければ両方SSL化しますので、「Enter」を押しましょう(この場合、DNS側で「www.ドメイン名」とIPアドレスが紐づけられているかどうかに注意しましょう)
⑦httpからhttpsへリダイレクトするかどうか
http://xxへアクセスされた場合、自動でhttps://xxへRedirectするかどうかを聞かれています
通常は2番のRedirectをオススメします
Obtaining a new certificate
 Performing the following challenges:
 http-01 challenge for itc-app.site
 http-01 challenge for www.itc-app.site
 Waiting for verification…
 Cleaning up challenges
 Deploying Certificate to VirtualHost /etc/apache2/sites-enabled/itc-app.site.conf
 Deploying Certificate to VirtualHost /etc/apache2/sites-enabled/itc-app.site.conf
 Please choose whether or not to redirect HTTP traffic to HTTPS, removing HTTP access.

 1: No redirect - Make no further changes to the webserver configuration.
 2: Redirect - Make all requests redirect to secure HTTPS access. Choose this for
 new sites, or if you're confident your site works on HTTPS. You can undo this
 change by editing your web server's configuration.

 Select the appropriate number [1-2] then [enter] (press 'c' to cancel):
「2」を押して、「Enter」で進みましょう
Redirecting vhost in /etc/apache2/sites-enabled/000-default.conf to ssl vhost in /etc/apache2/sites-enabled/itc-app.site.conf

 Congratulations! You have successfully enabled https://itc-app.site and
 https://www.itc-app.site
 You should test your configuration at:
 https://www.ssllabs.com/ssltest/analyze.html?d=itc-app.site
 https://www.ssllabs.com/ssltest/analyze.html?d=www.itc-app.site

 IMPORTANT NOTES:
 Congratulations! Your certificate and chain have been saved at:
 /etc/letsencrypt/live/itc-app.site/fullchain.pem
 Your key file has been saved at:
 /etc/letsencrypt/live/itc-app.site/privkey.pem
 Your cert will expire on 2021-09-28. To obtain a new or tweaked
 version of this certificate in the future, simply run certbot again
 with the "certonly" option. To non-interactively renew all of
 your certificates, run "certbot renew"
 If you like Certbot, please consider supporting our work by:
 Donating to ISRG / Let's Encrypt:   https://letsencrypt.org/donate
 Donating to EFF:                    https://eff.org/donate-le
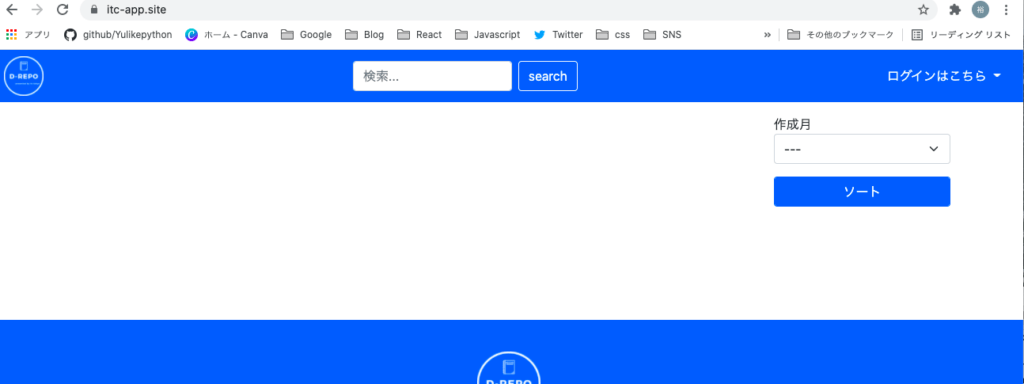
完了となります!!
httpsでアクセスすると、

まとめ
お疲れ様でした!
これで無料のSSL化の完成です
設定するための流れとしては、
- apacheの設定ファイルを書き換える
- 必要なライブラリのインストール
- certbotによるSSL化
でした
また必要なときがあればいつでも戻ってきてください!
また、certbotには一つだけ欠点があり、放っておくと期限切れとなってしまいます
設定したメールアドレス宛に事前通知が届きましたら対応の必要が有ります
再設定は今回よりも簡単ですが、メールが届くことを頭の片隅に入れておきましょう