
(最終更新月:2022年2月)
✔このような方へ向けて書かれた記事となります
「django-allauthのHTMLテンプレートを変更したい!」
「django-allauthのページをカンタンに上書きする方法が知りたい!」
「まだわからないことも多いので、実際のコードも見てみたいんだけど、、、」
✔当記事を通じてお伝えすること
- django-allauthのtemplatesを変更する3ステップ
- 変更したページの実例
django-allauthにはユーザー認証の機能が備わっているのがとても便利です。
ただし、テンプレートはCSSなどが何も適用されていないため見た目は良くありません。

こちらを一から作るのも大変なので、簡単に変更する方法をご紹介します。
また、最後には例として下記のページでの変更後のコードもご紹介ています。
- ログインページ
- ユーザー新規登録ページ
- パスワードのリセットページ
- メール送信ページ
- メールアドレス確認ページ
✔YouTube解説動画
当記事の内容は動画を見ながら進めると、約15分程度で完了します。
動画ならではの情報も解説しているので、記事と一緒にご覧ください。
動画の概要欄には、単元ごとのコードを紹介しているgithubページも載せています。

運営者プロフィール
![]()
現在はIT企業のプロダクトマネージャーとして、個人向け/社内向けシステムなど、複数のシステム開発・運営に携わっています。
Webサイト構築やECサイトの開発経験に加えて、PythonなどのプログラミングやSalesforceなどのクラウドアプリケーションに関する幅広い知識・経験を活かして「プログラミング初心者がスムーズに学べるサイト」を目指しています。
Githubでは、趣味で作成したアプリなどを公開しています。
✔人に見せても恥ずかしくないコードを書こう
「リーダブルコード」は、わかりやすく良いコードの定義を教えてくれる本です。
- 見るからにきれいなコードの書き方
- コードの分割方法
- 変数や関数の命名規則
エンジニアのスタンダートとすべき基準を一から解説しています。
何回も読むのに値する本なので、ぜひ手にとって読んでみてください。

変更した5つのテンプレート

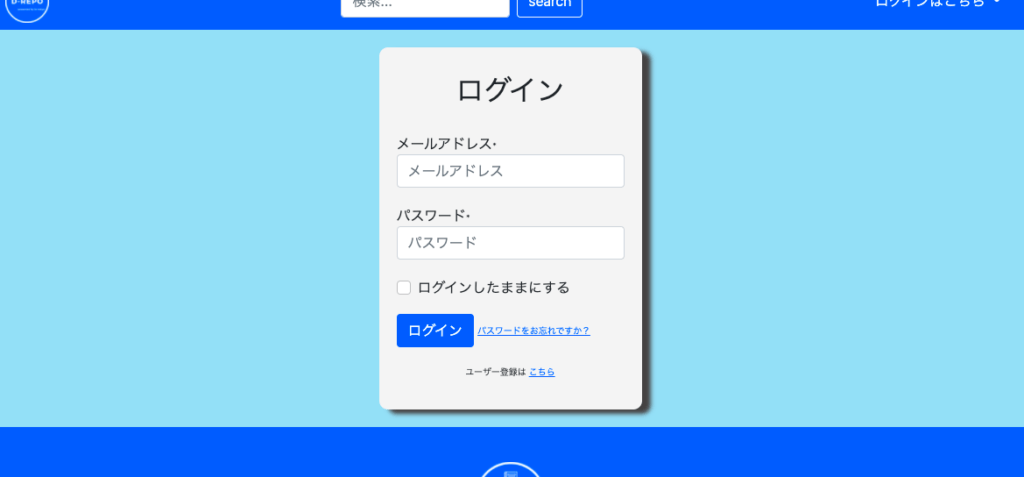
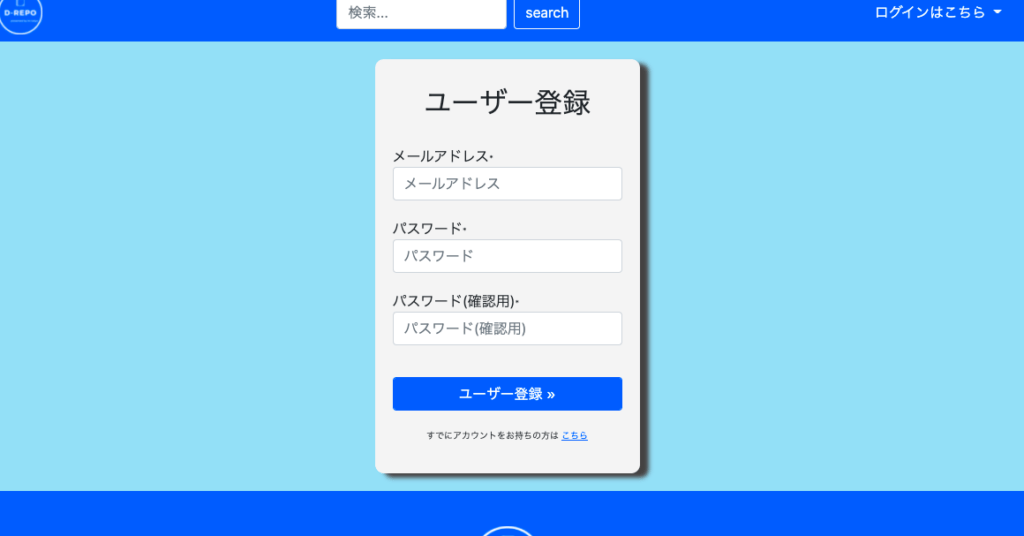
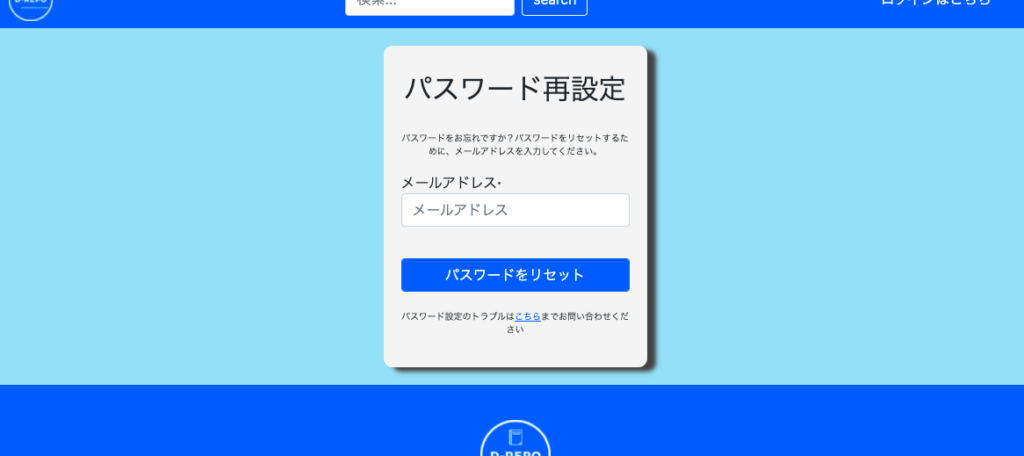
今回は「ログインページ」「新規登録ページ」「パスワードリセットページ」の3つを変更しました!
ログインページ

新規登録ページ

パスワードリセットページ

メール送信ページ


メールアドレス確認ページ


なんとなくイメージが湧きましたか?
新しいモジュールなどもインストールしていきますので、次章以降で順をおってご説明します。
django-allauthのテンプレートを変更する3ステップ

テンプレート書き換えの流れは下記の通りです。
- フォルダ・ファイルの作成
- crispy_formsのインストール
- ファイルの記述
順を追ってみていきます。
フォルダ、ファイルの作成
フォルダを下記の順序で作っていきます。
- プロジェクトフォルダ直下のtemplatesフォルダ内に「account」フォルダを作る
- accountフォルダ内に、①login.html②signup.html③password_reset.html④verification_sent.html⑤email_confirm.htmlを作成する
- githubページからそれぞれのコードをコピペする
django-allauthに限らず、モジュールのテンプレートを書き換える際はtemplatesフォルダ以下で同位置、同ファイル名にすると上書きができます
django-allauthのソースコードを元にテンプレートファイルがどこにあるか見てみると、

templates > account > ファイル名
となっていることがわかります。そのため、自身のプロジェクト内でも同じように作ることで同じ名前のファイルを上書きすることができます。
templates > account内が下記のとおりであればOKです。
account
├── email_confirmation.html
├── login.html
├── password_reset.html
├── signup.html
└── verification_sent.html
そのうえで、上記のソースコードから該当するページのコードを全てコピペすれば完了です。
また、CSSも適用していきますので
staticフォルダ > cssフォルダ > allauth.css
も作成しておきます
crispy_formのインストール
下記の流れでcirspy_formというモジュールをインストールします。
crispy_formは、フォームに対して自動でBootstrapクラスを適用してくれるモジュールです。
pip install django-crispy-forms
settings.pyのINSTALLED_APPSへ追記します。
INSTALLED_APPS = [
...,
"crispy_forms",
...,
]
下記も追記します。
CRISPY_TEMPLATE_PACK = 'bootstrap4'
以上で、インストール、設定は完了です。
当記事公開時のcrispy-formのバージョンは以下のとおり。
django-crispy-forms=1.14.0バージョンが異なるとエラーとなってしまうので、ご注意ください。
(こちらは読者様からご指摘いただき、追記させていただきました。なにかございましたら「問い合わせフォーム」「twitter」などご連絡お待ちしております。)
ファイルの記述
いよいよ、ファイルを記述していきます。
具体的なコードになりますので、次章で全て公開します。
実例コード紹介

該当のファイルだけでなく、継承元の「base.html」、CSS適用のために「allauth.css」も変更しています。
templates > account > login.html
{% extends "base.html" %}
{% load crispy_forms_tags %}

{% load i18n %}
{% load account socialaccount %}

{% block head_title %}{% trans "Sign In" %}{% endblock %}

{% block content %}
<div class="allauth_container">

{% get_providers as socialaccount_providers %}

{% if socialaccount_providers %}
<p>{% blocktrans with site.name as site_name %}Please sign in with one
of your existing third party accounts. Or, <a href="{{ signup_url }}">sign up</a>
for a {{ site_name }} account and sign in below:{% endblocktrans %}</p>

<div class="socialaccount_ballot">
  <ul class="socialaccount_providers">
    {% include "socialaccount/snippets/provider_list.html" with process="login" %}
  </ul>
  <div class="login-or">{% trans 'or' %}</div>
</div>
{% include "socialaccount/snippets/login_extra.html" %}
{% else %}
{% endif %}

<form class="login allauth_form" method="POST" action="{% url 'account_login' %}">
    {% csrf_token %}
    <h2>{% trans "Sign In" %}</h2>
    {{ form | crispy }}
    {% if redirect_field_value %}
    <input type="hidden" name="{{ redirect_field_name }}" value="{{ redirect_field_value }}" />
    {% endif %}

    <button class="primaryAction btn btn-primary my-3" type="submit">{% trans "Sign In" %}</button>
    <a class="button secondaryAction" href="{% url 'account_reset_password' %}">
        <span>
            {% trans "Forgot Password?" %}
        </span>
    </a>
    <p>ユーザー登録は <a href="{{ signup_url }}">こちら</a><p>
</form>
</div>
{% endblock %}
templates > accounts > signup.html
{% extends "base.html" %}
{% load crispy_forms_tags %}
{% load i18n %}
{% block head_title %}{% trans "Signup" %}{% endblock %}
{% block content %}
<div class="allauth_container">
<form class="signup allauth_form" id="signup_form" method="post" action="{% url 'account_signup' %}">
{% csrf_token %}
<h2>{% trans "Sign Up" %}</h2>
{{ form | crispy }}
{% if redirect_field_value %}
<input type="hidden" name="{{ redirect_field_name }}" value="{{ redirect_field_value }}" />
{% endif %}
<button class=" btn btn-primary my-3 form-control" type="submit">{% trans "Sign Up" %} »</button>
<p>すでにアカウントをお持ちの方は <a href="{{ login_url }}">こちら</a></p>
</form>
</div>
{% endblock %}templates > account > password_reset.html
{% extends "base.html" %}

{% load crispy_forms_tags %}

{% load i18n %}
{% load account %}

{% block head_title %}{% trans "Password Reset" %}{% endblock %}

{% block content %}
<div class="allauth_container">
    {% if user.is_authenticated %}
    {% include "account/snippets/already_logged_in.html" %}
    {% endif %}

    <form method="POST" action="{% url 'account_reset_password' %}" class="password_reset allauth_form">
        {% csrf_token %}
        <h2>{% trans "Password Reset" %}</h2>
        <p class="mb-3">{% trans "Forgotten your password? Enter your e-mail address below, and we'll send you an e-mail allowing you to reset it." %}</p>
        {{ form | crispy }}
        <input class="btn btn-primary my-3 form-control" type="submit" value="{% trans 'Reset My Password' %}" />
        <p>
            パスワード設定のトラブルは<a href="#contact">こちら</a>までお問い合わせください
        </p>
    </form>
</div>
{% endblock %}
templates > account > verification_sent.html
{% extends "base.html" %}

{% load i18n %}

{% block head_title %}
  メールアドレスを確認してください
{% endblock %}

{% block content %}
<div class="container my-5 bg-light p-4" style="max-width:450px;">
  <p class="text-center">
    <b><u>確認用のメールを送信しました!</b></u>
  </p>
  <p>
    メールの有効性が確認できるまでユーザー登録は完了となりません。
    メールに記載されたリンクをクリックして、ユーザー登録を完了させてください。
  </p>
  <div class="my-3">
    <a href={% url 'nippo-list' %} type="button" class="btn btn-danger form-control">トップへ</a>
  </div>
  <div class="text-right">
    <a href={% url 'account_login' %} class="my-4">メールか届かない(再送する)</a>
  </div>
</div>
{% endblock %}
templates > account > email_confirmation.html
{% extends "base.html" %}

{% load i18n %}
{% load account %}

{% block head_title %}
  {% trans "Confirm E-mail Address" %}
{% endblock %}


{% block content %}
<div class="container my-5 bg-light p-4" style="max-width:450px;">
<p class="text-center">
  <b>{% trans "Confirm E-mail Address" %}</b>
</p>

{% if confirmation %}

{% user_display confirmation.email_address.user as user_display %}

<p class="text-center">
  {% blocktrans with confirmation.email_address.email as email %}Eメールアドレス:
    <a href="mailto:{{ email }}">{{ email }}</a>
    が、ユーザー「{{ user_display }}」さんのものであることを確認してください。
  {% endblocktrans %}
</p>

<form method="post" action="{% url 'account_confirm_email' confirmation.key %}">
{% csrf_token %}
  <button class="btn btn-primary form-control" type="submit">
    {% trans 'Confirm' %}
  </button>
</form>

{% else %}

{% url 'account_email' as email_url %}

<p>
  {% blocktrans %}This e-mail confirmation link expired or is invalid. Please <a href="{{ email_url }}">issue a new e-mail confirmation request</a>.{% endblocktrans %}
</p>

{% endif %}
</div>
{% endblock %}
templates > base.html
django-allauthテンプレートの編集に伴い、既存の「base.html」にも変更を加える必要があります
<!doctype html>
<html lang="ja">
  <head>
    <meta charset="utf-8">
    <meta name="viewport" content="width=device-width, initial-scale=1">
    {% include 'css.html' %}
    {% block extra_css %}{% endblock %}
    <title>{% block head_title %}{% endblock %}</title>
    {% block extra_head %}{% endblock %}
  </head>
  <body>
    {% include 'nav.html' %}
    {% block allauth %}
      {% if messages %}
      <div>
      <strong>Messages:</strong>
      <ul>
          {% for message in messages %}
          <li>{{message}}</li>
          {% endfor %}
      </ul>
      </div>
      {% endif %}
    {% endblock %}
    {% block content %}{% endblock %}
    {% block extra_body %}{% endblock %}
    {% include 'footer.html' %}
    {% include 'js.html' %}
  </body>
</html>
static_local > css > allauth.css
CSSは下記のとおりです
body {
    background-color: rgb(164, 222, 243);
}
.allauth_container{
    width:80%;
    max-width:300px;
    margin:20px auto;
}

h2 {
    margin-bottom:30px;
    text-align:center;
}

.allauth_container .allauth_form {
    background-color:#f4f4f4;
    padding:30px 20px;
    border-radius:10px;
    box-shadow: 10px 5px 5px rgb(68, 66, 66);
}

.allauth_form input {
    margin-bottom:20px;
}
.allauth_form span {
    font-size: 10px;
    text-align: right;
}

.allauth_form p {
    margin:5px 0;
    text-align: center;
    font-size:10px;
}
cssファイルは下記の通り、css.htmlというファイルにまとめています
<!-- ほかは割愛 -->
{% load static %}
<link rel="stylesheet" href="{% static 'css/allauth.css' %}">
コピペ、コードの変更をしていきながら自身の意向にあったスタイルを適用させましょう。
まとめ

django-allauthには備え付けのテンプレートがありますが、CSSを適用しないことには使い物になりません。
HTMLテンプレートをできるだけ効率よく変更するには、
- モジュール内と同位置に同じ名前のフォルダ、ファイルを作る
- ブロックタグなどを引き継ぎながらコードを書き換える
という方法が最適です
同じ方法を使うと、Djangoのadminページのレイアウトもいじることが可能になります
そのためにはgithub上でソースコードをブックマークしておくととても便利です
以上でユーザーモデルの機能をカスタマイズする方法については完了とします。
最後に環境が変わっても対応できるよう、テストプログラムを作り、次へ進みましょう。